Saddle Seat Carving Explained: Techniques, Tools, and Tips for Woodworkers
Posted by Kutzall Tools
Filed in Other 10 views
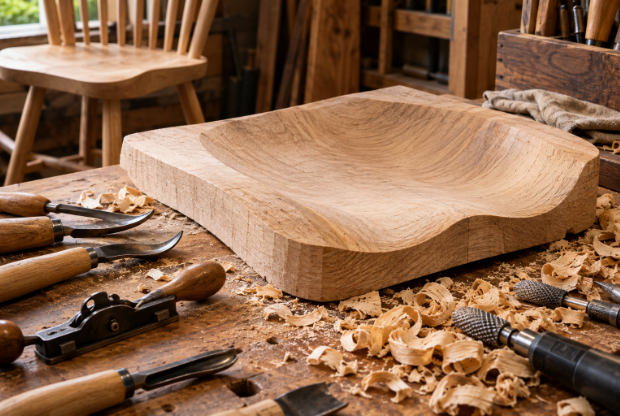
Few furniture-making skills test patience and precision quite like carving a contoured chair seat. Saddle seat carving is the process of shaping a flat wooden seat into a gently sculpted form that mirrors the curves of the human body, and it's a hallmark of well-built Windsor chairs, stools, and benches. Getting the contour right transforms an ordinary plank into a seat that feels custom-made, and understanding the process helps woodworkers of any skill level approach the task with more confidence.
What Makes a Saddle Seat Different
A saddle seat gets its name from its resemblance to a horse saddle, depressed in the center, slightly raised at the front, and gently sloped toward the back edge. Unlike a flat seat, this shape distributes weight more evenly and reduces pressure points, which is why the technique has remained popular in traditional chair-making for centuries. The contour typically follows the sitter's thighs and tailbone, meaning the depth and angle of the carve matter as much as the overall shape.
Choosing the Right Wood
Not every wood species carves equally well for this purpose. Softer hardwoods like poplar, basswood, and pine are common choices because they allow for smoother material removal without excessive tear-out. Denser woods such as oak or maple can be carved too, but they demand sharper tools and more deliberate technique when attempting saddle seat carving. Selecting a seat blank with straight, even grain also reduces the risk of chipping during the deeper cuts near the center of the saddle.
Tools Commonly Used
Saddle seat carving typically moves through three stages: rough shaping, refining, and finishing. Rough shaping is usually done with an adze, a scorp, or a coarse rotary carving disc to remove bulk material quickly. Once the general depression is established, travishers and curved spokeshaves help refine the contour and smooth transitions between the high and low points of the seat. Sandpaper or fine abrasive discs finish the surface, removing tool marks and preparing the wood for oil or finish application.
Step-by-Step Process
The process generally starts with marking the seat's centerline and the boundaries of the contour using a template or freehand layout. Woodworkers then rough out the depression, working from the outside edges toward the center to avoid tear-out. As the shape develops, frequent checking with a straightedge or by sitting test helps confirm the depth and slope feel natural. Successful saddle seat carving depends on blending curves smoothly, since any sharp transitions can create discomfort or visible tool marks once finished.
Common Mistakes to Avoid
Carving too aggressively near the center before establishing the surrounding contour is a frequent error, often resulting in an uneven or overly deep seat. Another common issue is neglecting the front edge, which should remain slightly higher to support the thighs comfortably. Rushing the sanding stage can also leave faint ridges that become noticeable once a finish is applied, so patience during the smoothing phase pays off in the final result.
Finishing Touches
After shaping, most woodworkers apply a penetrating oil finish, such as tung or linseed oil, to highlight the grain and add durability. Multiple thin coats, lightly sanded between applications, produce a smooth, tactile surface that holds up well to daily use. A properly finished seat should feel seamless under the hand, with no abrupt transitions between the carved depression and the surrounding flat areas.
Conclusion
Woodworkers exploring this technique often find that having a reliable set of shaping and finishing tools, such as those from Kutzall, makes the transition between rough carving and fine detailing noticeably smoother. Paying attention to wood selection, working in stages, and refining the contour gradually all contribute to a seat that looks intentional rather than rough. With steady technique and the right approach, this craft becomes a rewarding addition to any woodworker's skill set.